
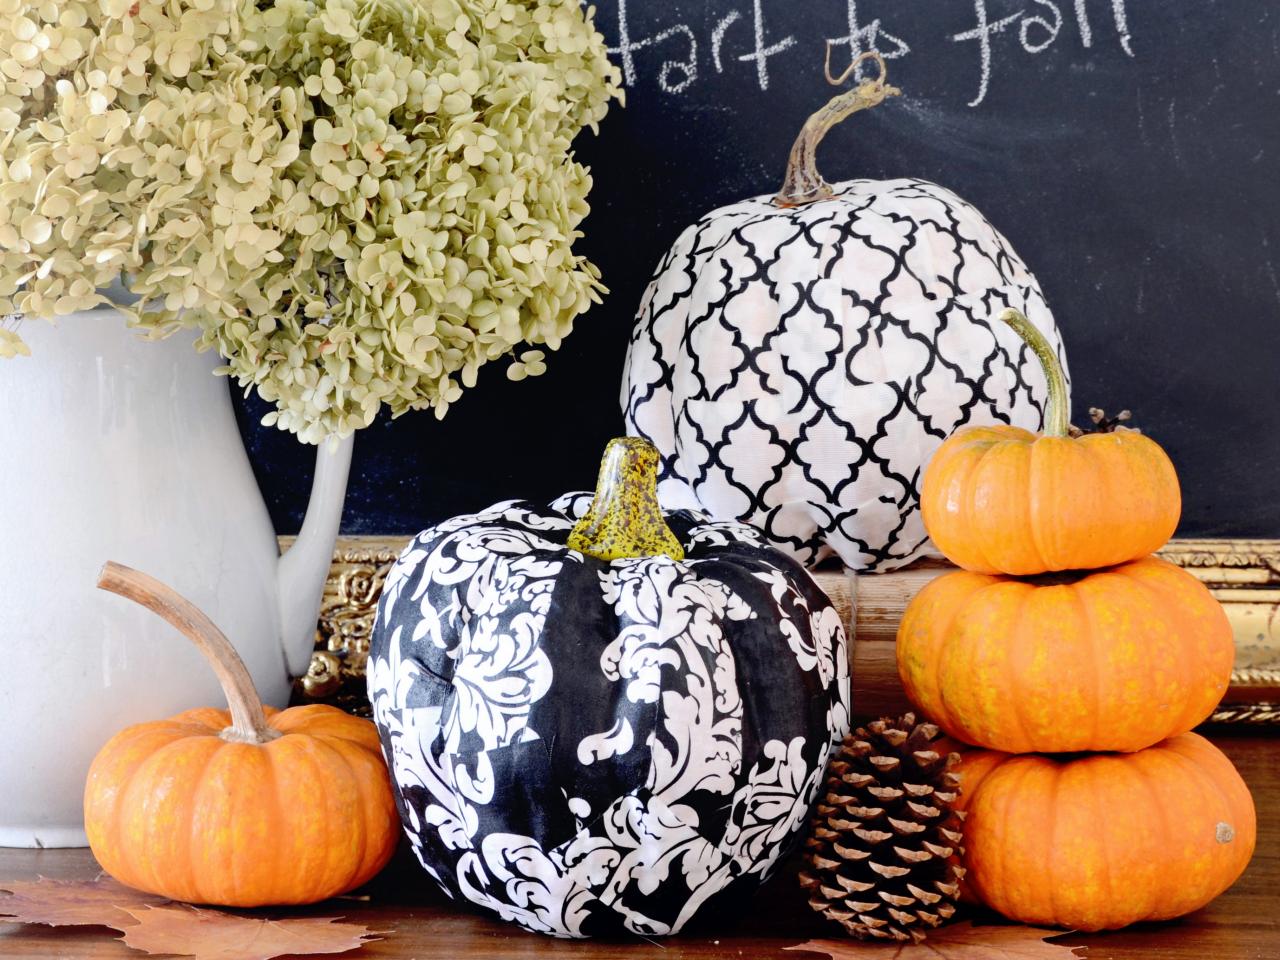
Decoupage is a fantastic way to create stunning, creative looks through the use of paper cut-outs. This Halloween, instead of setting out a standard pumpkin for the world to see, why not try this fun craft at home?
The steps are incredibly simple. Here is what you’re going to need.
- Wax paper
- Mixing bowl
- Narrow foam brush
- Mod Podge sealer
- Paper images
You’ll also need a pumpkin, of course. Craft pumpkins work best for this project because real pumpkins are often too porous to properly accept the Mod Podge. Once you have gathered your materials together, you’ll be ready to get to work.
Learning How to Decoupage Like a Pro
Step #1: Protect your workspace.
You’ll want to cover your entire working area with wax paper before you get started. Don’t take any shortcuts here. If you’re working on a table, then cover the entire table. This craft can be surprisingly messy sometimes.
Step #2: Pour out your Mod Podge.
Pout out the Mod Podge sealer into a mixing bowl. It’s better to have more in the bowl and not needed than to run short and put your project at risk.
Step #3: Prepare your paper.
You’ll want to trim your paper cut-outs to match the dimensions of your pumpkin. You can choose to wrap the entire pumpkin in one paper type, if you wish, or use different papers to create your own unique design. Once you’ve trimmed the paper to the correct size, you’ll want to take the narrow foam brush and spread an even coat of the Mod Podge onto the back of it.
Step #4: Affix the paper.
Now you’ll want to press the image onto your pumpkin. Smooth out the paper to remove any air bubbles that may have formed while placing the paper. Then repeat until you’ve covered the entire pumpkin. To create an image which fits the contours of the pumpkin better, try cutting small slits into the top and bottom of the paper. It also helps to work on one half of the pumpkin at a time, allowing for about 10 minutes of drying time on each side.
Step #5: Coat the paper with sealant.
Once the paper has dried to the pumpkin, you’ll want to seal the paper against exterior elements. You can do that by taking the foam brush to apply a thin layer of Mod Podge on the entire pumpkin. Let the exterior dry for one hour, then give it a second coat of Mod Podge. The second coat will need to dry for 24 hours before it is ready for display.
What Designs Will You Create This Halloween?
With decoupage, you can create a stunning pumpkin with any favorite design. You can even add pictures of your family, your favorite cartoon characters, or anything else you can print off the Internet.
Follow these steps and you’ll be able to create a decoupage pumpkin that everyone will be talking about in no time at all.